For local branches in the East Kingdom, the royal encampment at Pennsic provides a lovely opportunity for heraldic display. Traditionally, each barony, province, shire, canton and riding is invited to create a fabric panel displaying their arms, and the collection is hung side-by-side around the edge of the camp to represent the populace while providing a modicum of security and privacy.
(I’ve previously posted photos of the panels for Østgarðr and its cantons.)
These panels can be expected to last for decades, but eventually they will need to be replaced, and so the Chamberlain’s office provides instructions for constructing new panels. (We relied on this information when we constructed a new panel for the Canton of Appleholm after changing our branch arms in 2018.)

As useful as those instructions are, I thought it might be helpful to have them presented in a slightly different format, so I put together a reference sheet which contains the same information in an updated layout.
The instructions are included below and are also available as a full-size PNG image or a printable PDF.
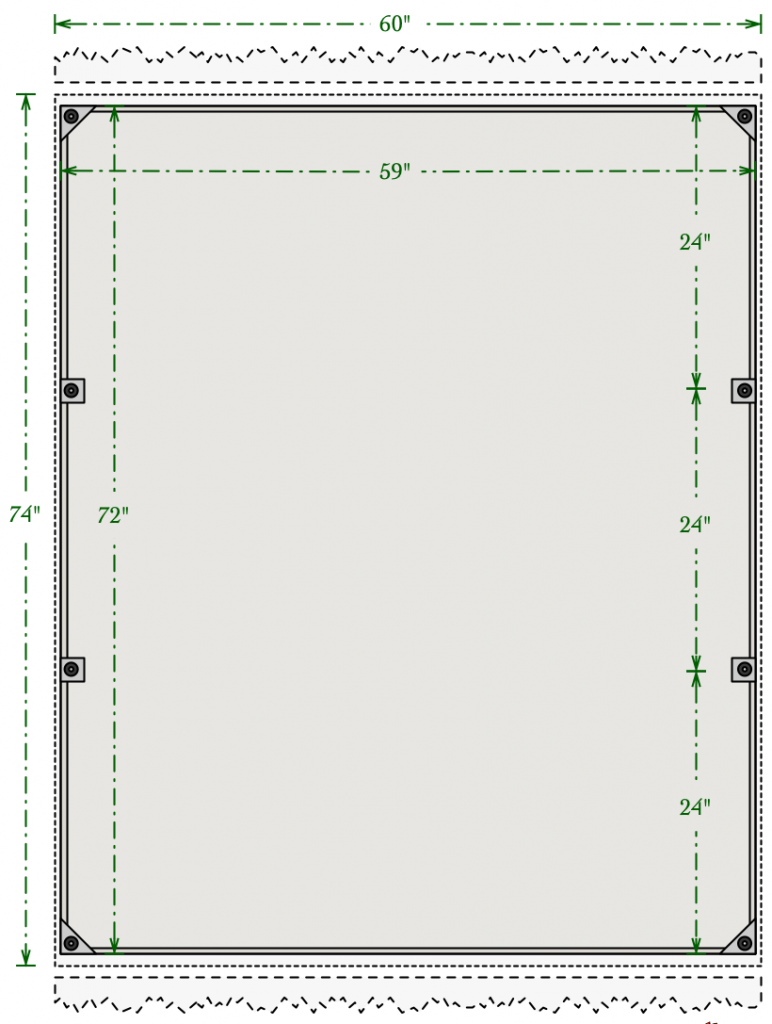
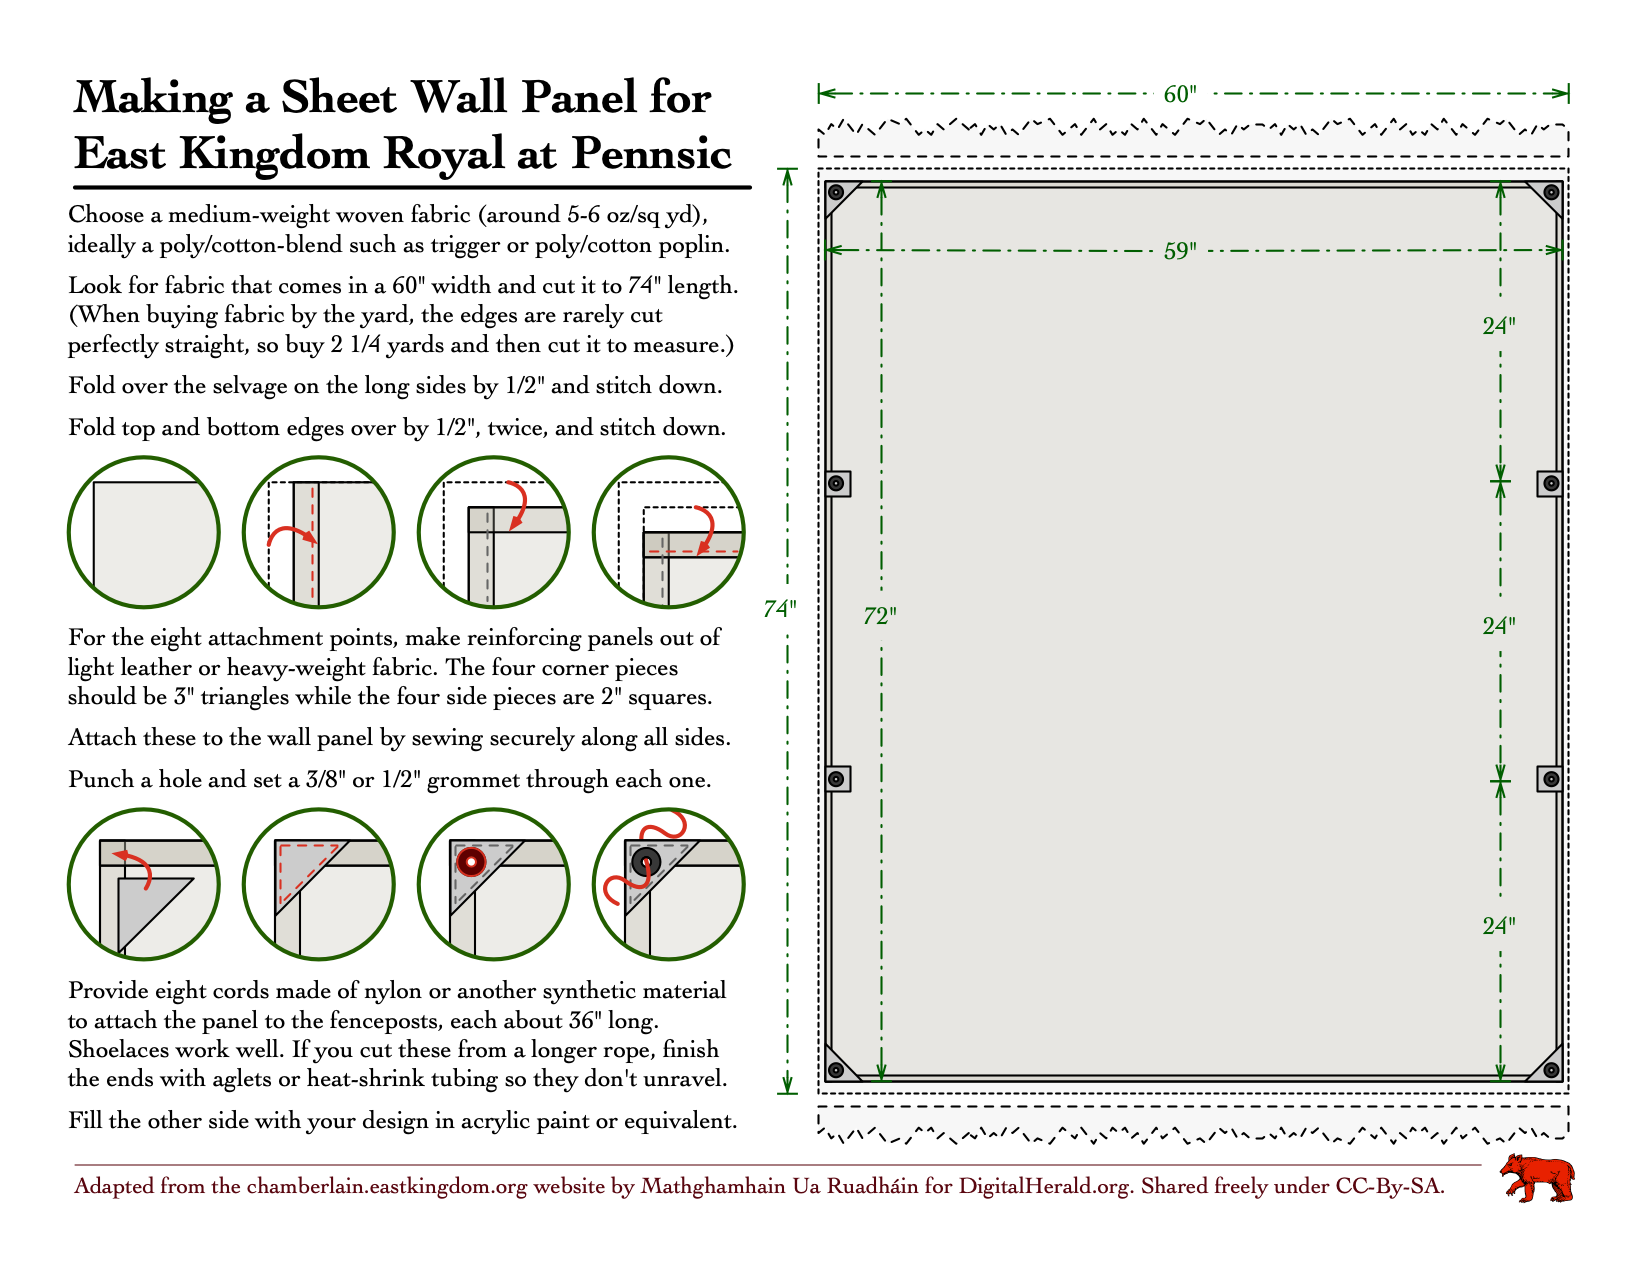
Choose a medium-weight woven fabric (around 5-6 oz/sq yd), ideally a poly/cotton-blend such as trigger or poly/cotton poplin.
Look for fabric that comes in a 60″ width and cut it to 74″ length. (When buying fabric by the yard, the edges are rarely cut perfectly straight, so buy 2 1/4 yards and then cut it to measure.)
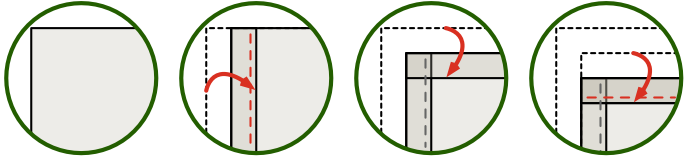
Fold over the selvage on the long sides by 1/2″ and stitch down.
Fold top and bottom edges over by 1/2″, twice, and stitch down.
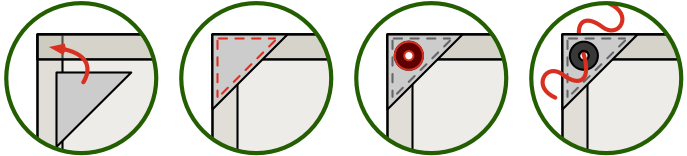
For the eight attachment points, make reinforcing panels out of light leather or heavy-weight fabric. The four corner pieces should be 3″ triangles while the four side pieces are 2″ squares.
Attach these to the wall panel by sewing securely along all sides.
Punch a hole and set a 3/8″ or 1/2″ grommet through each one.
Provide eight cords made of nylon or another synthetic material to attach the panel to the fenceposts, each about 36″ long. Shoelaces work well. If you cut these from a longer rope, finish the ends with aglets or heat-shrink tubing so they don’t unravel.
Fill the other side with your design in acrylic paint or equivalent.